5.2 KiB
NetGIS Client Integration Tutorial
Welcome to the NetGIS Client Integration Tutorial. This is a step-by-step guide how to integrate the netgis client into a web site.
Basic Setup
Let's start by writing a very simple, mobile-friendly HTML document where the client will be displayed:
<!DOCTYPE html>
<html>

	<head>
		<meta http-equiv="content-type" content="text/html; charset=utf-8" />
		<meta http-equiv="X-UA-Compatible" content="IE=edge" />
		<meta name="viewport" content="width=device-width, initial-scale=1.0, maximum-scale=1.0, user-scalable=no" />

		<title>NetGIS Client Tutorial</title>
	</head>

	<body>
	</body>

</html>
Next up we need to include at least two dependencies for the client to work properly: OpenLayers for map rendering and FontAwesome for icons. Add these CSS files to the head section:
<link rel="stylesheet" type="text/css" href="/libs/fontawesome/5.12.0/css/all.min.css" />
<link rel="stylesheet" type="text/css" href="/libs/openlayers/10.0.0/ol.css" />
And at the bottom of the body section also add the OpenLayers JS file:
<script type="text/javascript" src="/libs/openlayers/10.0.0/ol.js"></script>
You can see the latest tested versions of these libraries in the path names.
Now let's include the pre-compiled netgis client package from the repositories /dist folder in the head:
<link rel="stylesheet" type="text/css" href="../dist/netgis.min.css" />
And in the body:
<script type="text/javascript" src="../dist/netgis.min.js"></script>
This tutorial is working from inside the /demo folder, so make sure your paths are correct.
Creating The Client Instance
Once all the styles and scripts are ready, we can create our client. First let's create a simple container element to display the client in:
<div id="container" style="height: 400px"></div>
Then we can write the main script that will create the client instance:
<script type="text/javascript">

	var client = new netgis.Client( "container" );

</script>
But it won't work yet without a valid configuration. So let's create a config JSON object and pass it as second parameter to the client constructor:
var config = {};

var client = new netgis.Client( "container", config );
Note that this client configuration JSON could also come from a URL or some backend script like PHP or Django.
OK, in theory we have now created a client, but it is not yet displaying anything.
Let's expand the config and define some essential client modules to display a basic menu bar and an empty map:
var config =
{
	"modules":
	{
		"menu": true,
		"map": true
	},

	"menu":
	{
		"header": "Tutorial"
	},

	"map":
	{
		"center_lonlat": [ 7.0, 50.0 ],
		"zoom": 14
	}
};
So now we should see our menu with just the header text and a gray empty map area below it. You can read about all the config options in the Documentation of each module. Let's add a simple image tiles layer from OpenStreetMap to show some map content by adding the layers section to the config object:
"layers":
[
	{ "id": "osm", "type": "OSM", "title": "Open Street Map", "attribution": "OpenStreetMap Contributors", "active": true }
]
This should now display the OpenStreetMap base layer for the south west of Germany according to our defined center coordinates.
Adding More Modules
To give proper credit to the map layer providers we now add the attribution module, and the map controls module to make navigation a little easier:
"modules":
{
	"menu": true,
	"map": true,
	"attribution": true,
	"controls": true
}
The attribution should now appear at the bottom right of the map view, but there are no map controls yet. These (like most other menu-like modules) need their actual button items to be defined like this controls section:
"controls":
{
	"buttons":
	[
		{ "id": "zoom_in", "icon": "<i class='fas fa-plus'></i>", "title": "Zoom +" },
		{ "id": "zoom_out", "icon": "<i class='fas fa-minus'></i>", "title": "Zoom -" },
		{ "id": "zoom_home", "icon": "<i class='fas fa-home'></i>", "title": "Zoom Home" }
	]
}
Note the button ids with special values that call certain actions when clicked (see Commands in the docs).
Finally let's add a layer tree panel for layer selection.
First we need to activate the module:
"layertree": true
We just activated the module, but the layer panel is hidden by default. Let's add a button to the top menu to toggle the panel using the menu items section:
"menu":
{
	"header": "Tutorial",
	"items":
	[
		{ "id": "layertree", "title": "<i class='fas fa-layer-group'></i><span>Layers</span>" }
	]
}
Note the same pattern for the menu items as for the map controls. Again certain id values have special meanings, like toggling the layer tree.
This is how the final result should look like:
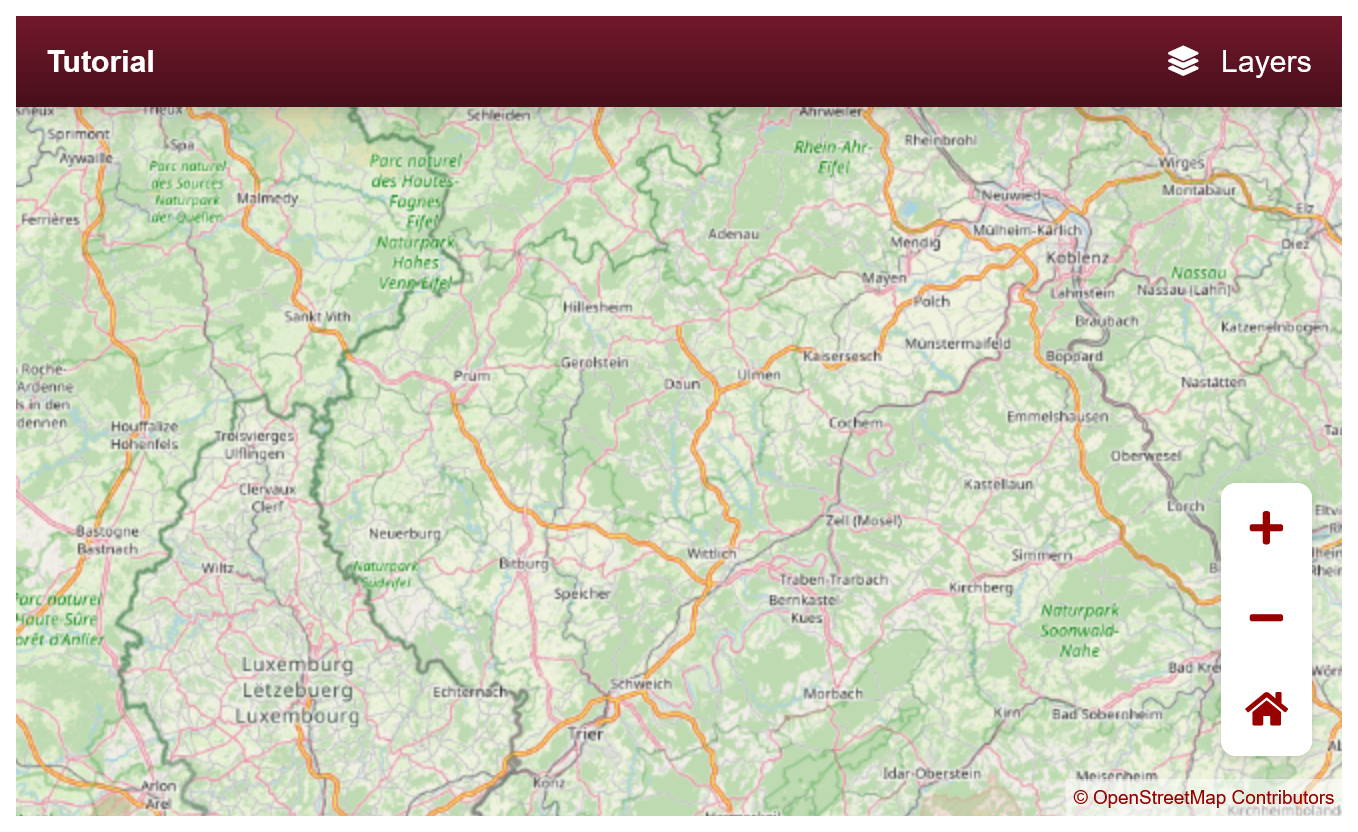
That's it for the basic netgis client tutorial. You can find the complete example in /demo/tutorial.html. Thanks for reading!